The following was published in the December 2016 issue of the digital-only Photography Magazine produced by National Geographic Traveller (UK Edition). Download the free app on iTunes, Google Play, or Amazon to browse more of the articles in these insightful issues.
—
Although the graduated neutral density filter has long been an essential tool for landscape photographers, it is never one that I’ve owned myself. Ironically I’ve come to love the Graduated Filter tool in Lightroom to selectively darken or lighten portions of my images.
One of the difficulties with photography is that the camera can’t capture the range of light that our human eyes can see. Although I we see highlights and shadows in a high-contrast scene, the camera’s dynamic range can’t capture both ends of that spectrum. While using the aforementioned “grad ND” filter or an HDR (high dynamic range) technique can solve this problem when used effectively, my preference has been to learn when a scene is too high contrast for my camera’s dynamic range and decide to either return when the light is more balanced or look for a different composition.
Therefore, I’m not using Lightroom’s Graduated Filter to try to recover highlights or shadows where detail was completely lost, but I’m instead starting with raw images that are well exposed and using the tool to optimize the image.
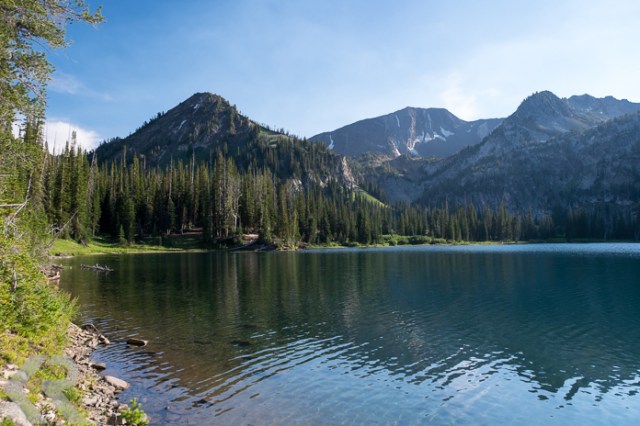
For example, I photographed this landscape while riding a gondola up into the Wallowa Mountains of Eastern Oregon. I loved how from that perspective I could show the dramatic change of terrain from rugged mountains to the flat farmland. The camera, set to matrix metering, gave me an exposure that captured all tones of the image from shadows to highlights. Still, mottled clouds darkened portions of the foreground filled with trees while the clouds and sky in the background appeared much brighter. To darken the background sky, the Graduated Filter was the perfect tool.
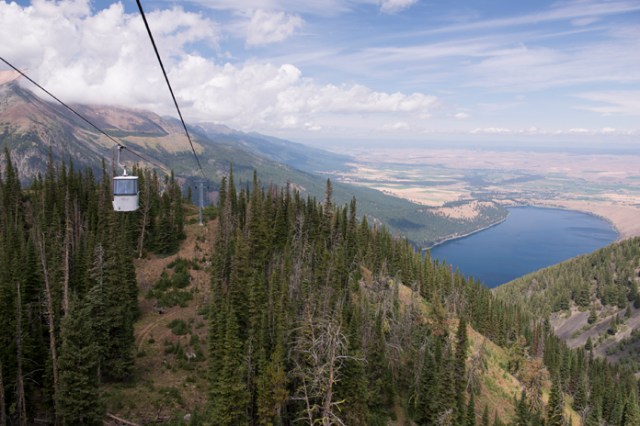
Version exported from original Nikon D800 camera raw settings.
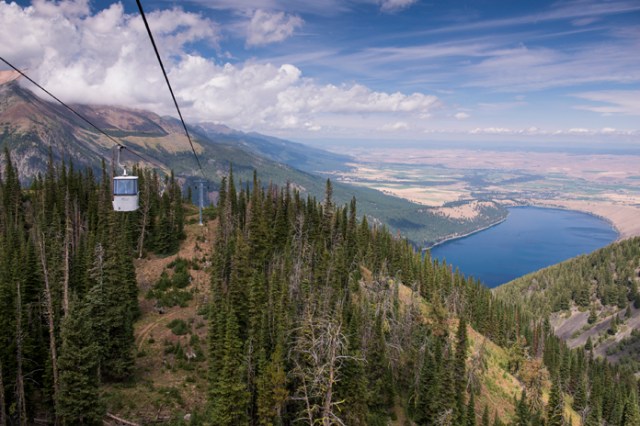
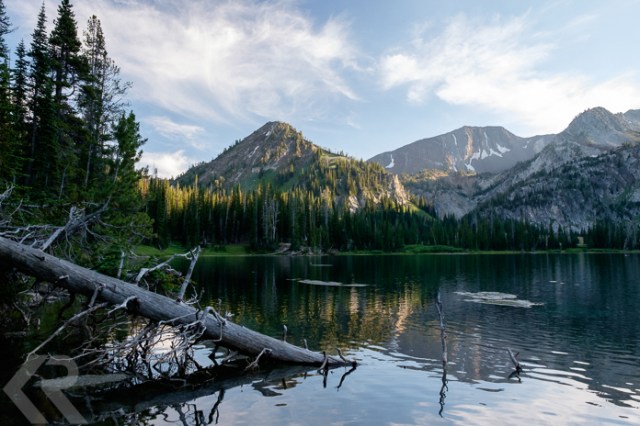
Final version after using the Graduated Filter to darken the sky, plus overall contrast.
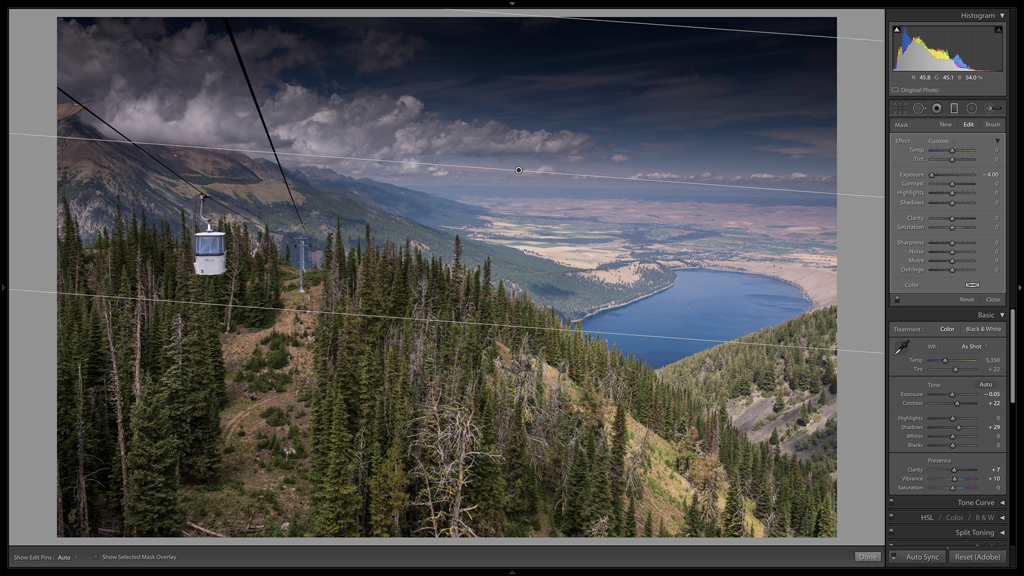
- In Lightroom, with the above photo selected, I went into the Develop module. Before using the Graduated Filter, I first did universal adjustments to my raw image using the sliders in the basic adjustment panel. I darkened the overall exposure slightly by -.5 and added contrast of +22. I also opened up the shadows, to show more details in the trees, by setting the slider at +29. I gave the image a slight boost in clarity to +7 and gently bumped the vibrance slider to +10 (Warning: it is easy to make colours appear unrealistic very quickly with this slider).
- Then I clicked on the Graduated Filter icon in the row of icons above the basic adjustment panel, but I could also have used the keyboard shortcut M to activate the tool.
- Once activated, an adjustment panel popped up above the basic adjustment panel and I could see multiple adjustments options that were very similar to those in the basic panel. Although there are other uses for the Graduated Tool, because my primary goal with the tool was to recover some of the detail in the clouds and color in the blue sky, I decided to use the exposure slider to selectively darken a portion of the image. Before setting the placement of the filter on the image, I set my exposure slider at the extreme amount of -4 so that I could see the effect when placing the filter.
- I then clicked on the top of the image and pulled down with my cursor that had turned into a plus symbol. A horizontal row of three lines appeared, and I drug the lines at an angle until the middle line, which has a grey pin in the center, lined up just below the sky and clouds. By dragging the lines further apart, I was also making the transition of the filter effect more gradual. Tip: hold down the shift key while using this tool for a perfectly straight horizon or rotate the tool after placement by activating the double arrows when hovering your cursor over the middle line.
- With the middle line of the filter placed just below the sky and clouds, I next set the exposure to -.78 and increased contrast to +22. To toggle the effect on/off, I clicked the light switch button on the bottom left of the panel because I wanted to double-check that my adjustments were realistic. In general, I rarely change the exposure much more than one stop in either direction.
- I had the option to then layer on more Graduated Filter effects, each with their own settings. And if I had added one I didn’t like, I simply needed to hit the delete key while it was activated. Because I was happy with the one Graduated Filter effect, I clicked “Done” in the bottom right of the image panel.
While this post-processing tool cannot replicate the physical usage of a “Grad ND” filter in the field, nor can it effectively restore an poorly exposed image, I find it a useful tool to optimize my images. And as with any tool in post production, one has to be careful not to let the tool show.