Photography is a tricky medium. With it, we are translating the 3D world into a 2D outcome. So how to you take a landscape, which has depth, and make a viewer see and feel dimension while looking at a flat screen or a flat photographic print?
First, we must realize that not every scene that we come across in real life is going to make a stunning photograph. How often on your travels do you pull over at a viewpoint and your jaw drops because the scene in front of you is gorgeous, but when you take the photo it just looks flat?
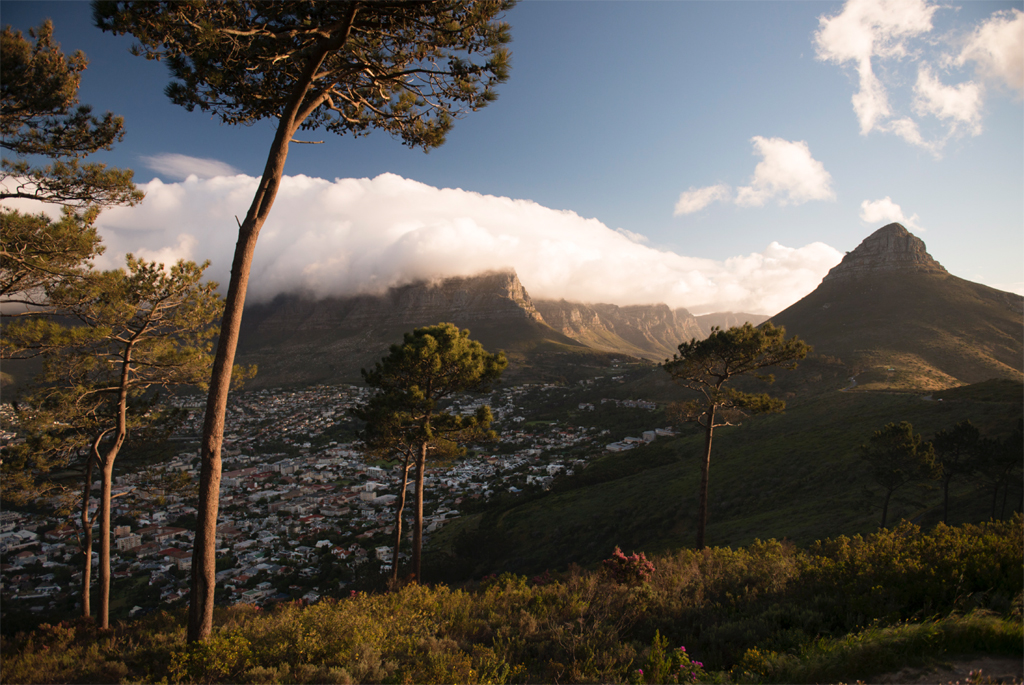
As photographers, we are responsible for “building in” depth to our pictures by adding layers into our landscapes. Sometimes light creates natural depth in a scene for us. As in the above shot from Cape Town, angled sunlight creates long shadows that tell our eyes there is dimension in the scene. Other times, we have to work harder to find a position to shoot from that incorporates interesting foregrounds, middle grounds, and backgrounds that force layers in the photograph.
In this post, I’ll show you a few photos from a recent backpacking trip into the Eagle Cap Wilderness in Eastern Oregon that will hopefully shed a little light (pun intended) onto how I think when composing a landscape shot.
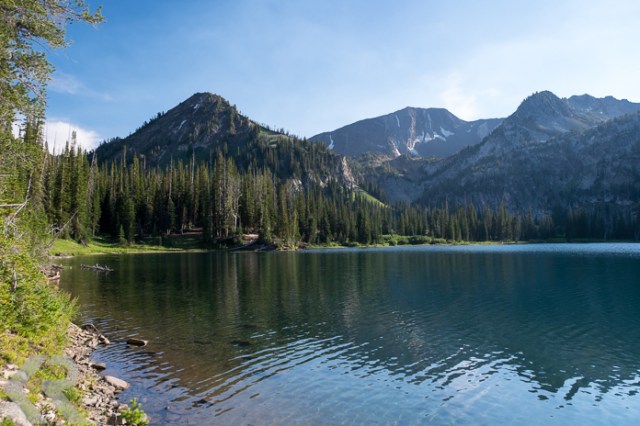
I’ll begin with the above straightforward “postcard”shot of Aneroid Lake that was taken in mid-afternoon. The angle of the sun allows a bit of play between light and shadow on the mountains (and is much more forgiving that if I’d taken this shot at noon), but there isn’t any depth to this photo aside from a bit of foreground leading my eye into the frame on the left.
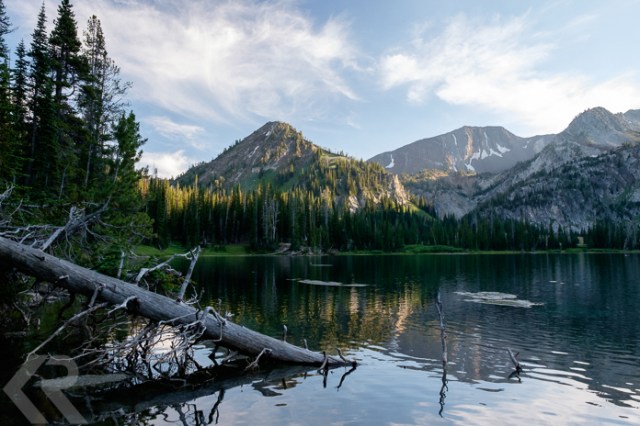
I decided to wait a bit longer for the sun to set further and create more dramatic light. You can see that the light is almost dancing around the mountain peak and has made the row of trees along the lake’s edge seem spotlit. I also decided to work harder by wading into the chilly water and finding a fallen tree to use as foreground. The silhouetted trees in the mid-ground also help to add dimension.
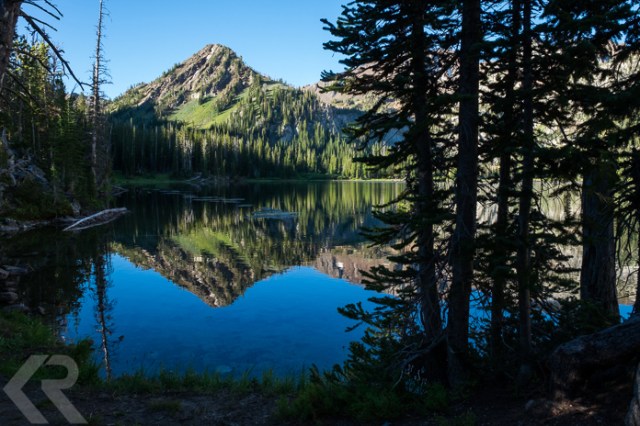
Still not totally satisfied, I got up early the next morning to see if I could make an even better picture. In this setup, I found some trees to use as dramatically silhouetted foreground and I was careful to include the curving bank to frame the edge of the photo and lead my eye back into the scene. The morning sun cast beautiful light onto the mountainside and gave dimension to the forest and rocks.
—
How do you add dimension and layers into your landscape shots? Feel free to leave your comments below.

Enjoyed you post, useful tips.
Great tips. I use images in foreground to help create 3-D but using light is a great added dimension.
That is great info, and helps to see samples of what you are explaining!
Strange, the Cape Town shot should have showed up….maybe it didn’t in the email version because I set it as the featured image? I can’t figure out how to have it be large as the featured image and not repeat if it is embedded in the post.
Krista, you had the ‘luxury’ of being able to stay at the same place for a day or more. How could you improve the dimension of your first photo if that were the only time you had to be there. Often when traveling from place to place you only get one chance.
I did notice that in the first photo there were no ‘framing’ or ‘foreground’ items and that the last photo was very carefully framed. the photo with them as well as the water was calmer. I know that you would lose something due to the early morning light but wonder how it would have looked if you had the same framing for the first photo.
It would have been more interesting to see the same photo as the last one in the different lighting situations.
Just an amateur photog and retired engineer who likes to take photos but mostly does it on a tour or while traveling from place to place without the luxury of being able to choose when I am there.
Well, Ken, the luxury of time does allow for better photographs; and it actually isn’t a luxury I always have as a travel photographer. I have to work with what I’m given, but if I have any ability to “scout” beforehand, even if that means using Google, that will help me be best prepared for the window of time I have in a specific place. The first shot was meant to show that framing was needed. And I think if I understand you correctly, the first shot could have worked with the last framing, but turns out that the light was better for that scene the next morning.
Krista has added a layer of knowledge to my skills to translate my probable good picture into a better picture. What Krista did not explain is how she took all the waves out of the water, seems like all my pictures have waves! Ha
Ha! I got lucky with the wind, but when I was wading out for photos I did have to wait for the water to calm a bit…and for my legs to get even more numb with cold!